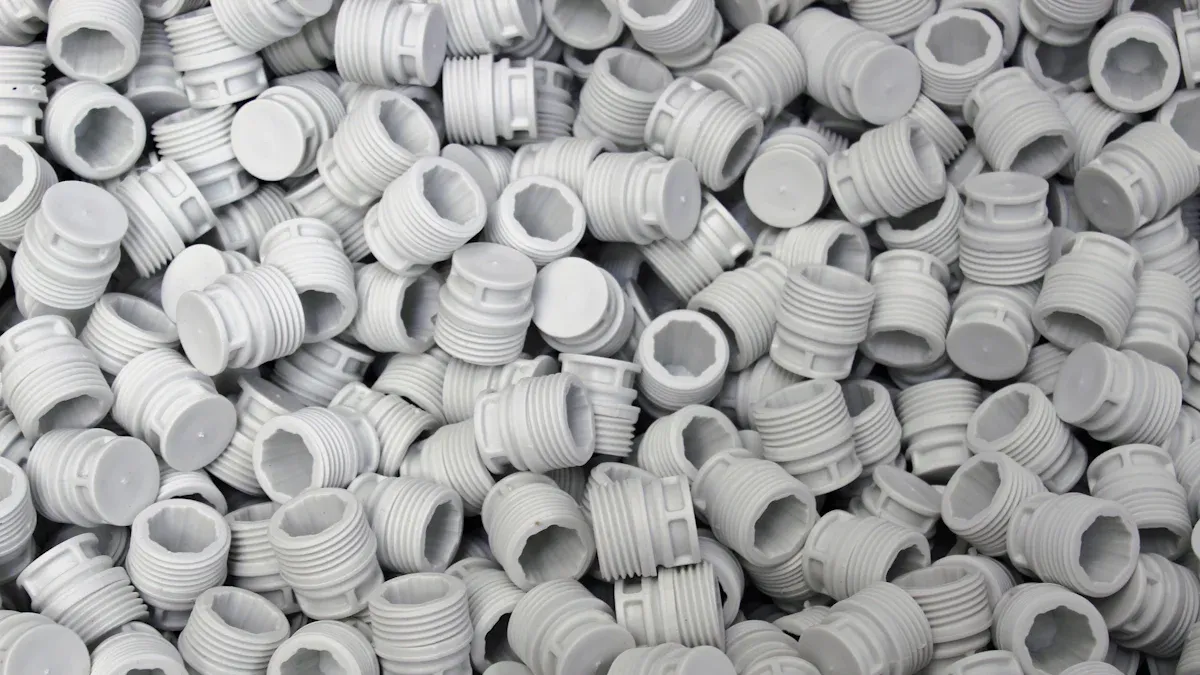
You use a water-cooled mold temperature controller to keep mold temperatures steady during plastic molding. This careful control helps stop problems and keeps quality the same. When you manage temperature well, you get:
Fewer looks problems like flow marks and less shine
Less shrinking, so your products fit and work right
Steady assembly accuracy, which is important for car parts
Shorter cooling times, so you can make things faster
When you use this controller, you make your products better and your process more reliable.
Key Takeaways
Water-cooled mold temperature controllers keep the mold at the right temperature. This helps make better products and stops mistakes from happening.
These controllers help cool things down faster. This means you can make more products in less time.
Pick a controller with a temperature range from 20°C to 180°C. This range works for most plastic molding jobs and helps keep things accurate.
Take care of the controllers by checking water quality and cleaning filters often. This stops problems and keeps everything working well.
Safety features like alarms for high temperatures and automatic pressure control help protect machines and people.
These controllers use less energy. They help save power and lower costs by making cooling and heating work better.
It is important to install and set up the controllers the right way. Always follow the rules to stop problems from happening.
Teach workers how to use and take care of the controllers. This keeps everyone safe and makes sure the controllers work well.
Water-cooled Mold Temperature Controller Overview
What Is a Water-cooled Mold Temperature Controller?
A water-cooled mold temperature controller keeps the mold at the right temperature. It uses water to cool or warm the mold as needed. Water moves through the mold to take away heat or add warmth. You can set the temperature from 20°C to 180°C. This range works for most plastic injection molding jobs. The controller is very accurate, usually within ±0.5°C. This helps stop problems like warping or sink marks.
Here is a table that shows the main features and where you can use it:
Feature/Application Area | Description |
|---|---|
Temperature Control | Gives exact control of mold temperature. This keeps the plastic material heated evenly. |
Efficiency Improvement | Makes molding cycles shorter. This helps you work faster and save money. |
Quality Enhancement | Lowers the number of bad products. It also makes molded items look better. |
Stability and Accuracy | Keeps the mold temperature steady. This stops defects from temperature changes and helps with high-precision needs. |
Application in Electronics | Used for making electronic product housings that need to be very exact. |
Application in Automotive Parts | Controls temperature for strong plastic materials in car parts. |
Application in Medical Devices | Keeps molding steady for medical devices that need to be very reliable and exact. |
Application in Household Appliances | Helps high-temperature plastic parts in home appliances work better. |
You can use a water mold temperature controller in many fields. These include electronics, cars, medical devices, and home appliances.
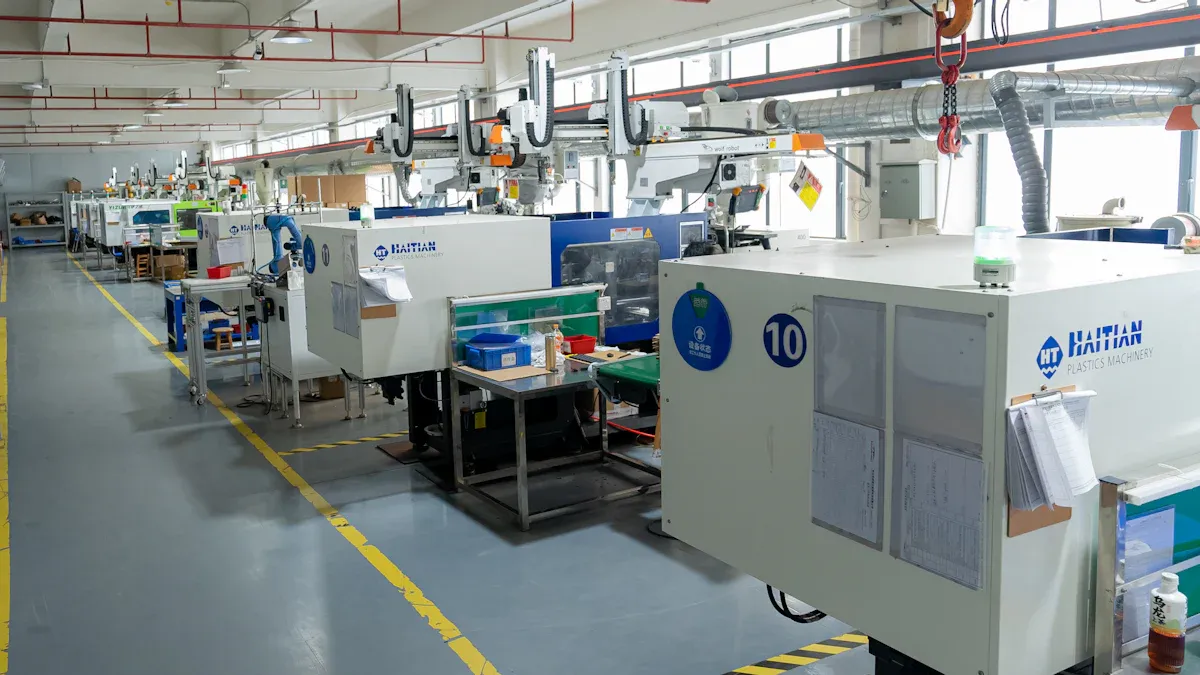
Role in Injection Molding
You need steady temperature control for good injection molding results. The water-cooled mold temperature controller keeps the mold at the same temperature. This helps you make parts that look good and are strong. If you do not control the temperature, you might get defects or warping. This controller gives even temperature, so you get fewer defects and better quality. You can also make more products in less time. The controller keeps your process steady and your products the same.
Tip: Always check the mold cavity temperature before you start making parts. This helps you avoid problems and keeps your process steady.
Comparison with Oil-based Mould Temperature Controllers
You might wonder how water-cooled controllers are different from oil-based ones. The main difference is what they use to move heat. Water-cooled controllers use water. Oil-based controllers use heat transfer oil. Here is a table to show the differences:
Feature | Water-Cooled Controllers | Oil-Based Controllers |
|---|---|---|
Heat Transfer Medium | Water | Heat Transfer Oil |
Efficiency | Works better for temperatures below 90°C (194°F) | Not as good for low temperatures |
Temperature Range | Up to 180°C (356°F) | Up to 350°C (662°F) |
Ideal Applications | Plastic injection molding, high-volume jobs | Engineering plastics, die casting, thick parts |
Advantages | Heats and cools fast, saves money and energy | Can handle higher heat, works well at high temperatures |
Pick a water cooling system if you need fast heating and cooling. It is good for most plastic injection molding jobs. Oil-based controllers are better for very high temperatures or special plastics. Both types help keep your process steady. But water-cooled controllers save more energy and work faster for most jobs.
How Water-cooled Mold Temperature Controllers Work
Operating Principles
Water-cooled mold temperature controllers help keep molds at the right temperature. These controllers use a simple process to do this. First, sensors check if there is enough water in the system. Next, heating elements or a cooling unit change the water temperature. The water gets warmer or cooler as needed. A pump moves the water through the mold. This helps spread heat or cooling evenly. Sensors watch the temperature all the time. The controller uses smart math, like PID, to make changes fast. This keeps the temperature steady. This process helps stop defects and keeps things running well.
Key Components
It is important to know the main parts of a water-cooled mold temperature controller. Each part helps the system work well and stay safe.
Component | Importance |
|---|---|
Pump | Moves water through the system, keeping the mold at a steady temperature. |
Temperature Sensor | Checks the water temperature, so the controller can make quick adjustments. |
Control Unit | Runs the heating, cooling, and pumping systems for precise temperature control. |
Expansion Tank | Handles changes in water volume, preventing pressure problems. |
Heat-Transfer Fluid | Carries heat between the controller and the mold, affecting how well the system works. |
Water Circuit
The water circuit is the path for water to move. Water goes from the controller to the mold and back again. The pump keeps the water moving at the same speed. This helps the mold stay the same temperature everywhere. It stops hot or cold spots from forming.
Heating and Cooling Elements
Heating elements make the water hotter when needed. The cooling unit makes the water cooler by taking away extra heat. You can switch between heating and cooling very fast. This is important when you need to work quickly.
Digital PID Controller
The digital PID controller is like the system’s brain. It gets data from sensors and makes changes right away. You pick the temperature you want. The controller keeps the temperature close to your target.
Safety Features
Safety features keep your equipment and people safe. Automatic pressure control stops pressure from getting too high. Anti-dry heating protection stops the system if there is not enough water. Alarms let you know if something is wrong. You can fix problems fast when you hear an alarm.
Process Flow in Molding
There are clear steps when you use a water-cooled mold temperature controller for injection molding. First, put temperature sensors in the mold core and cavity. These sensors watch the surface temperature. The controller gets this data as the mold heats up from the plastic. When the mold surface is at the right temperature, the controller opens a valve. This sends a strong burst of coolant into the mold. The system uses fast-moving water to take away heat quickly. This keeps the temperature difference between the start and end low. During curing, the coolant stops flowing. This lets heat spread out for the next shot. If you pause, the mold surface gets back to the set temperature fast. You can start making parts again with little wait time.
Tip: Check your sensors and water circuit often for blockages or leaks. This helps your system work its best.
Benefits of Water-cooled Mold Temperature Controllers
Enhanced Product Quality
You want every part to look the same. A water-cooled mold temperature controller helps you do this. The cooling layer in the system makes heat move faster. This design spreads heat evenly on the mold surface. Your products have smoother surfaces and better shapes.
The cooling layer stops hot spots and keeps heat steady.
Even heat helps you copy small details and tricky shapes.
You lower the chance of warping, sink marks, and other problems.
Using good cooling methods means you throw away fewer parts. You can meet strict rules in car and medical industries. If you use mold temperature controllers the right way, your products look good and work well.
Note: Even heat control helps you copy tiny shapes and keep sizes steady.
Energy Efficiency
You can save energy by using a water-cooled mold temperature controller. This controller lets you set the right heat for each mold. You keep each mold separate from the main cooling system. You pick the best heat for your job. This way, you do not waste energy and your work stays fast.
When you set up the cooling system well, you use only what you need. You do not cool too much or heat too much. This saves power and keeps costs down. Water cooling also helps your machines run well for a long time.
Reduced Cycle Times
You want to make parts faster. Cooling takes up most of the time in molding. A water-cooled mold temperature controller helps you make this time shorter. If you make water move faster, heat leaves quicker. For example, a flow rate of 50 L/h can make cycle time 150 seconds shorter.
If you set the cooling and molding heat just right, you can make hard parts 3-5% faster. This means you make more parts in less time. The controller keeps the mold at the right heat, so you can start again quickly. You get more parts and use your machines better.
Tip: Pick the best cooling system and check your mold temperature controllers often. This helps you keep cycle times short and results steady.
Safety and Reliability
You need a mold temperature controller to keep your workplace safe. It also helps your process stay reliable. Water-cooled mold temperature controllers have over ten safety devices. These features help stop accidents and keep equipment working well.
Over-temperature alarms tell you if the mold gets too hot.
Automatic pressure control stops dangerous pressure from building up.
Anti-dry heating protection shuts off if water is low.
Timer control lets you set safe times for work.
Signal control makes sure the system reacts fast to changes.
Temperature control modes help you keep the right heat for each job.
Leak detection warns you about water circuit problems.
Emergency stop buttons let you turn off the system quickly.
Flow sensors check water movement and stop overheating.
Circuit breakers protect against electrical problems.
Insulated pipes help prevent burns and save energy.
You do not need special training to use these controllers. The control panel has easy buttons and clear screens. Regular workers can use the system safely. You can trust the controller to keep molds at the right temperature. It also protects your team.
Tip: Always check safety alarms and sensors before each shift. This helps you find problems early and avoid stopping work.
Cost Savings
You want to spend less money and earn more profit. Water-cooled mold temperature controllers help you save by making cooling better. Most molding time is spent on cooling, about 60-80%. If cooling is slow, you spend more time and money on each part.
These controllers keep molds at the best temperature. You finish cycles faster and use less energy. You make more parts in less time. Your products have fewer mistakes, so you waste less material. You also pay less for repairs because the system protects itself.
Water-cooled controllers help you save money in many ways:
Shorter cycles mean lower labor costs.
Better cooling lowers energy bills.
Fewer mistakes mean less scrap and rework.
Good safety features cut down on maintenance costs.
You will see savings grow over time. When you pick a water-cooled mold temperature controller, you get a system that saves money. It helps you work better and spend less.
Note: Doing regular maintenance and setting up your controller right helps you save the most money.
Selecting a Water-cooled Mold Temperature Controller
Temperature Range and Accuracy
You must pick a controller with the right temperature range. Every molding job needs a certain heat level. Some plastics need high heat to melt and flow. Others need lower heat to set fast. If you choose the right range, your process stays steady. Your products will be strong and last longer.
Good temperature control is very important. Water-cooled mold temperature controllers use smart sensors and digital PID math. These keep the temperature steady. You get accuracy within ±0.5°C. This helps you stop defects and make every part the same. This control lets you make high-quality parts again and again.
You can set the best temperature for each material and mold.
The controller heats and cools fast, so you can change jobs quickly.
Tight control helps you make parts with the right shape and look.
Tip: Always check the controller’s specs before starting a new job. This helps you meet each material’s needs and avoid mistakes.
Power and Flow Rate
You need the right power and flow rate for your mold and plastic. The heater power and pump flow decide how fast you heat or cool the mold. Thin-walled or high-volume parts need a fast pump to cool quickly. Thick parts or heavy molds need more heater power and a strong pump. This helps reach every part of the mold.
Here is a table to help you match power and flow rate to your job:
Mold Type | Heater Power Needs | Pump Flow Needs |
|---|---|---|
Thin-walled, high-volume parts | Medium heater, fast pump | High flow for quick cooling |
Thick parts, heavy molds | Strong heater for heat recovery | Strong, steady flow for far-away mold spots |
Process temperatures > 120°C | Use oil-based mold temperature controller | Higher head pump for long water channels |
If you size your controller right, you keep cycle times short. You also stop overheating and protect your tools. This gives you the best results from your molding work.
Compatibility with Injection Molding Machines
You must make sure your controller works with your molding machines. The cooling liquid, pipe design, and mold material all matter. Water is common because it cools well and is easy to use.
Check that the pipes fit your mold and machine setup.
Make sure the controller can handle your mold material and product needs.
Look for a design that keeps the mold surface at the same temperature.
When you match the controller to your machine and mold, you get better cooling. You have fewer defects and a smoother process. Maintenance is easier and your system lasts longer.
Note: Check your machine and mold needs before buying a new controller. This helps you avoid problems and get the most value.
Safety Certifications (CE, UL)
You should look for safety certifications when picking a water-cooled mold temperature controller. These marks show the controller follows strict safety and quality rules. The two main certifications are CE and UL.
CE Certification: This mark means the controller follows European safety, health, and environment rules. It is safe to use in European factories.
UL Certification: This mark is from Underwriters Laboratories in the United States. It shows the controller passed hard tests for electrical and fire safety.
If you see these marks, the controller has been checked carefully. Certified products help keep your team and equipment safe. Many buyers and inspectors want to see these marks before using a controller.
Tip: Always ask for proof of certification before buying. Certified controllers help you follow the law and keep your workplace safe.
Here is a table that compares what each certification covers:
Certification | Region | Focus Areas | Why It Matters |
|---|---|---|---|
CE | Europe | Safety, health, environment | Legal use in EU, safe design |
UL | United States | Electrical, fire, mechanical | Trusted in North America |
Choosing a controller with both CE and UL certifications is smart. It shows you care about safety and quality.
Material Construction and Durability
You want your mold temperature controller to last a long time. The materials used in the controller matter for how well it works and how long it lasts.
Manufacturers use strong, corrosion-resistant materials to make controllers reliable. These materials help the controller handle water, heat, and chemicals in molding shops. Here are some common materials you might find:
Stainless steel pumps are strong and do not rust, even with lots of water.
Corrosion-resistant heat exchangers help the controller last longer in tough places.
Tough materials all over the unit help it work well, even with heavy use.
Always check what the controller is made of before buying. Look for stainless steel water tanks and brass fittings. These parts do not rust or wear out fast. Insulated pipes keep heat in and save energy.
Note: Strong construction means fewer breakdowns and less time fixing things. You save money on repairs and replacements over the years.
If you pick a controller with good materials, you get long-lasting performance. Your controller will keep your molds at the right temperature every shift.
Installation and Setup
Pre-installation Checklist
Get ready before you install your water-cooled mold temperature controller. First, read the machine’s specification sheet. This sheet tells you the size and weight. Make sure you have enough space for everything. You need room for the molding machine and material feeders. Check if you have all the right fittings, tubing, and clamps. These are needed for power and water connections. Look around your workspace for anything that blocks access. Make sure your electrical supply matches what the controller needs. Gather tools like wrenches, pressure gauges, and flow meters. Read the safety instructions from the manufacturer. Doing these steps helps you avoid mistakes and keeps things safe.
Tip: Always check your list twice before you start. If you miss something, your setup can be delayed.
Site Preparation
Getting your site ready helps the installation go well. Follow these steps to prepare:
Get the specification sheet for your mold temperature controller. It shows the size and weight.
Make sure there is enough space for all machines and feeders. You also need room for auxiliary equipment like mold temperature controllers, granulators, and hot-runner controllers.
Plan where power cables, water pipes, chiller lines, and drains will go. Order the right fittings, tubing, and clamps for each connection.
Put water filters with pressure gauges on both the inlet and outlet. These gauges help you see if the filter is clogged and keep water clean.
Set up your mold temperature controller with flow monitoring and pressure sensing on both the inlet and outlet. This helps you watch performance and find problems early.
Doing these steps makes your workspace safe and neat. It also makes future maintenance easier.
Connecting Water and Power
You need to be careful when connecting water and power. Use these tips for a safe and good setup:
Use an in-line flow meter to check coolant flow and pressure drop. This tool helps you make sure water moves at the right speed.
Make your piping slope gently. Add a vent valve to stop air from getting trapped. Air pockets can cause uneven cooling and hurt your mold.
Set your PID settings right to stop temperature overshoot. Good settings help your controller recover fast from changes.
Use advanced control features. Preheat scheduling warms up your mold before you start. Set automatic over-temperature alarms to protect your equipment.
Check for leaks in all connections before turning on the system. Make sure your electrical wiring follows local rules and matches the controller’s needs. Label all pipes and cables so you can find them easily during maintenance.
Note: Careful water and power connections help your mold temperature controller work well and last longer.
Initial Configuration
You must set up your water-cooled mold temperature controller before you start. This helps you get good results and avoid problems later. First, check if the controller fits your molding job. If it is too small, it cannot heat or cool fast. If it is too big, you might waste energy. Always make sure the power rating and flow rate match your mold and machine.
Next, look at the control panel. Set your mold temperature with the digital PID controller. This controller keeps the temperature steady within ±0.5°C. Type in your target temperature, then check the screen to see if it is right. If your controller has preheat scheduling, use it to warm up the mold before you start. This saves time and stops cold spots.
You should also check the water circuit. Make sure water moves well through all channels. Look for leaks or blockages. If you find any, fix them before you go on. Clean cooling channels help heat move fast and even. This stops hot spots and keeps your parts looking nice.
Here is a checklist for setting up:
Set the right temperature on the digital PID controller.
Check water flow and pressure with the gauges.
Look at all water lines for leaks or blockages.
Use preheat scheduling if you have it.
Check that all safety alarms and sensors work.
Tip: Make a plan for regular maintenance. Check parts, change old ones, and clean cooling channels often. This keeps your system working well and stops breakdowns.
You can help heat move faster by picking molds made from high thermal conductivity materials. These materials let heat move quickly, so your controller works better. If you use good mold design and materials, you get better results and shorter cycle times.
Last, write down your first settings and system status. Keep a log of temperature setpoints, flow rates, and changes you make. This helps you watch how things work and see patterns over time. If you spot changes, you can fix small problems before they get big.
Careful setup helps you get steady, high-quality molding. You protect your equipment, save energy, and make better products from the start.
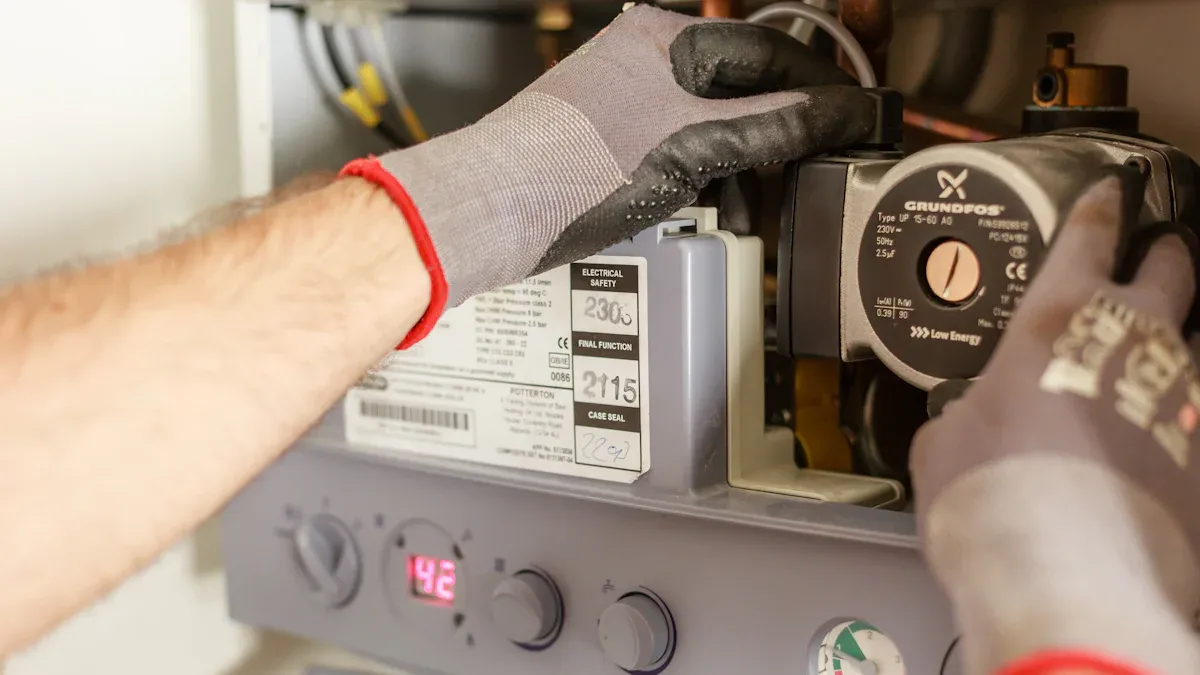
Operating Mold Temperature Controllers in Molding
Daily Operation Procedures
Begin each day by checking your mold temperature controller. Make sure the power is on. Look at the display to see the temperature. Check the water level in the cooling system. Look for leaks or blockages in the pipes. Make sure the pump works well and the flow meter shows steady movement. Set the temperature for your molding job using the control panel. Wait until the mold reaches the right temperature before starting injection molding. Watch alarms and indicators. If you see a warning, stop and fix the problem right away. Clean the filters and check the water quality before each shift. These steps help keep your process safe and your products the same.
Tip: Write down your start-up checks in a logbook. This helps you notice patterns and stop problems early.
Monitoring and Adjusting Settings
You need to watch your mold temperature controllers while making parts. Use the digital control system to check the temperature and flow rate. The iQ flow control software changes the pump speed by itself. This smart feature keeps the mold temperature steady. It also saves energy by up to 85%. You save money and lower CO2 emissions every year. If you see temperature changes or alarms, change the settings on the controller. Adjust the flow rate or temperature setpoint if needed. Adaptive control lets you switch settings for different materials or part shapes. This makes your process more stable and lowers rejects. Temperature control mistakes cause 20% of rejects in injection molding. By using advanced monitoring, you stop these errors and keep production running well.
Method | Benefit |
|---|---|
Mold Temperature Controllers | Keeps mold temperature exact and steady. |
Digital Control Systems | Lets you watch and change settings easily, making things work better. |
Adaptive Control | Changes settings for different materials, making the process stable. |
Note: If the system finds big temperature changes, it can stop the machine to avoid bad parts.
Water Quality Management
You must keep the water in your cooling system clean. Dirty water can block pipes and slow heat transfer. Check the water filters every day. Change them if you see dirt or low pressure. Use a water treatment system to take out minerals and stop scale from building up. Test the water for hardness and pH. Soft water helps your controller work better and keeps the mold safe. If you see rust or cloudy water, flush the system and fill it with clean water. Good water quality helps your cooling system work well and makes your equipment last longer.
Tip: Plan regular water tests and cleaning. Clean water means better cooling and fewer repairs.
Operator Training
You must learn how to use a water-cooled mold temperature controller. Training helps you use the system safely and well. It also helps you avoid mistakes and keep things running. When you know how to use the controller, you protect your machines and make better products.
First, learn about temperature control. You need to set the right temperature for each job. The digital PID controller lets you change the temperature very exactly. You should know how to read the screen and change the settings. Practice checking the mold temperature before and during work. This helps you stop problems and keep parts the same.
Maintenance is also important. You should check the controller often. Clean the filters and cooling channels so water moves well. Change old parts before they break. Write down what you do in a logbook. This helps you see problems early and plan repairs. Good care makes your controller last longer and stops delays.
Troubleshooting helps you fix problems fast. Learn what alarms and warning lights mean. If you see a temperature jump or low water flow, look for leaks or clogs. Use the control panel to check the system. Practice resetting the controller and fixing easy problems. Fast fixes keep your work on time.
Water pressure is important for safety. Watch the pressure gauges on the inlet and outlet. Too much or too little pressure can hurt the mold or controller. Change the valves to keep pressure safe. If you see big changes, check the water circuit for trouble. Good pressure helps the system cool and heat the mold right.
Turbulent flow helps cool the mold better. Learn how to change the pump speed and flow rate. Fast, swirling water takes heat away faster. You should know how to use flow meters and set the best flow for each job. This helps you make parts faster and better.
Tip: Have training often for all workers. Update training when you get new machines or change how you work.
Training Topic | Why It Matters |
|---|---|
Temperature Control | Prevents defects and keeps quality high |
Maintenance | Reduces downtime and extends equipment life |
Troubleshooting | Solves problems quickly |
Water Pressure Management | Protects molds and controllers |
Turbulent Flow Improvement | Improves cooling and cycle times |
Good training helps you feel sure and skilled. Trained workers help the molding process run safely and smoothly.
Maintenance and Troubleshooting
Routine Maintenance Tasks
You must take care of your mold temperature controller to get good results. Doing regular checks helps stop breakdowns and keeps things working well. At the start of each week, check the water level. Look at all hoses to see if there are leaks. Check the control panel to make sure alarms and lights work. Test the temperature sensors to see if they show the right numbers. Clean the filter screens so water can move easily. If your pump needs oil, add it now. Write down what you check in a logbook. This helps you see problems early and fix them before they get worse.
Tip: Set reminders for weekly and monthly checks. Taking care of your controller often helps it last longer.
Cleaning and Descaling
The water you use can change how well your controller works. Minerals in water can build up inside the system. This is called scale. Scale can block water and make heat move slower. Clean and descale your controller every month or when needed. First, turn off the power and let the system cool down. Drain all the water from the tank and pipes. Use a soft brush to clean inside the tank. For scale, use a cleaner made for cooling systems. Follow the cleaner’s instructions. Rinse the system with clean water before turning it back on. Always wear gloves and safety glasses when using chemicals.
A clean system lets water move fast and helps the mold get hot or cold quickly. It also helps stop damage to pumps and valves.
Replacing Components
Some parts in your controller will wear out after a while. You need to change these parts to keep things safe and working right. Parts you may need to replace are pump seals, gaskets, and temperature sensors. If you see leaks, hear strange sounds, or get wrong temperature numbers, check these parts first. Always use the right parts for your controller’s model. Turn off the power before you start fixing anything. Follow the maker’s guide for each step. After you put in a new part, test the system to make sure it works well.
Note: Keep extra parts in your workshop. Having spares helps you fix things fast and keep making products.
Common Issues and Solutions
You might run into problems when using a water-cooled mold temperature controller. It helps to know what can go wrong and how to fix it fast. This keeps your molding work safe and smooth. The table below lists the most common problems, why they happen, and what you can do:
Common Issues | Description | Troubleshooting Steps |
|---|---|---|
Temperature Control System Malfunction | Bad sensors or control panel can make the system heat too much. | Check temperature settings, look at sensors, and change broken parts. |
Heater or Heating Element Issues | Broken heaters or not enough fluid can make things too hot. | Clean heating elements often, keep fluid level right, and use the right heater power. |
Insufficient Fluid Flow | Pump problems or clogged filters stop water from moving well. | Make sure the pump works, clean filters, and check pipes for blockages. |
Inadequate Cooling | Dirty fans or blocked heat exchangers slow down cooling. | Clean cooling systems, check water flow, and make sure fans work. |
Check your temperature controller often. If the mold gets too hot, look at the temperature settings first. Sometimes sensors break or the control panel shows wrong numbers. Check these parts and change any that do not work.
Heater problems can cause overheating. If the heater is broken or not right for the job, things get too hot. Clean the heating elements and make sure there is enough water. Pick the heater power that fits your process.
Fluid flow is important for keeping the mold cool. If the pump stops or filters get dirty, water cannot move well. Check the pump and clean the filters. Make sure pipes are clear so water flows easily.
Cooling problems happen if fans are dirty or heat exchangers are blocked. Low water flow also slows cooling. Clean the cooling system and check water speed. Make sure fans help heat leave the mold.
Tip: Write down problems and how you fix them. Good records help you see patterns and stop future trouble.
If you do these steps, you can fix most problems fast. This keeps your molding safe and your products good.
Optimizing Mould Temperature Controllers for Performance
System Audits and Upgrades
You should check your system often to keep it working well. Start by looking at your controller’s logs. See if the temperature or cycle times have changed. If things are not as good, check the sensors and pumps. Change any parts that look old or broken. Look at your maintenance records too. This helps you find problems and know when to upgrade.
Getting a new controller can help you do better work. New controllers have clearer screens and better sensors. Some let you set special temperatures for each mold. You can add alarms or ways to watch the system from far away. These upgrades help you find problems early and keep your work smooth.
Tip: Do a full check of your system every six months. This helps your equipment last longer and keeps your products the same.
Integration with Automation
You can make your factory smarter by linking your controller to other machines. Many new controllers can talk to factory computers. This lets you change temperatures from one computer. You can also see live data about temperature, water flow, and alarms.
Using automation helps stop mistakes. The system can change settings for each mold by itself. You can set alerts to warn you if something is wrong. This saves time and helps you keep your products good.
Here is a table that shows how automation helps:
Benefit | How It Helps You |
|---|---|
Centralized Control | Change settings from one place |
Real-Time Monitoring | Spot issues right away |
Data Collection | Track performance over time |
Fewer Mistakes | Reduce manual errors |
Note: Ask your supplier about automation that works with your machines.
Environmental and Energy Considerations
You can use less energy by setting your controller the right way. Only set the temperature as high as you need for your job. Use pipes with insulation to keep heat from escaping. Check for leaks in the water pipes, because leaks waste water and energy.
Pick a controller that saves energy. Some have pumps that slow down when you do not need much power. You can use timers to turn off the system when you are not using it. These ideas help you save money and help the environment.
Think about water quality too. Use filters and water treatment to keep water clean. Clean water protects your mold and helps your system last longer.
Tip: Look at your energy bills every month. Small changes in how you use your controller can save you a lot of money.
You get better results in injection molding if you pick the right water-cooled mold temperature controller. If you install it carefully and take care of it often, your mold will work well and stay safe. Look at how your mold temperature controller is set up now. Talk to experts if you notice any problems. Use smart tips to make your products better and help your equipment last a long time.
FAQ
What is the ideal temperature range for water-cooled mold temperature controllers?
Most water-cooled controllers work from 30°C to 180°C. This range fits many plastics and rubber jobs. Always check what temperature your material needs before you set it.
How often should you perform maintenance on your controller?
Check your controller every week. Clean the filters and look at hoses for leaks. Do a full inspection and descale once a month. Regular care helps stop breakdowns and keeps things working well.
Can you use tap water in the cooling circuit?
Use filtered or treated water instead of tap water. Tap water has minerals that can cause scale and block pipes. Clean water helps your controller work better and last longer.
What safety features should you look for in a controller?
Find controllers with over-temperature alarms and automatic pressure control. Anti-dry heating protection and emergency stop buttons are important too. These features help keep your equipment safe and protect your team.
How do you know if your controller is compatible with your molding machine?
Check the controller’s power, flow rate, and connection sizes. Make sure these match your molding machine. Look at the manufacturer’s chart or ask your supplier for help.
What certifications should your controller have?
Look for CE and UL certifications on your controller. These marks show the controller meets safety and quality rules. Certified controllers help you follow industry standards.
How can you reduce energy costs with a water-cooled mold temperature controller?
Set the temperature only as high as you need. Use insulated pipes and check for leaks often. Pick a controller with energy-saving features like variable-speed pumps. These steps help you save money on energy bills.
https://www.szdxzl.cn/water-cooled-mold-temperature-controller-plastic-molding-guide.html